TpT is having a Back to School Bonus Sale today and my store is participating!
Use the promo code BTSBONUS and save up to 25% off paid products-today only. This is a great time to snag anything you might have missed during the earlier Back to School Sale.
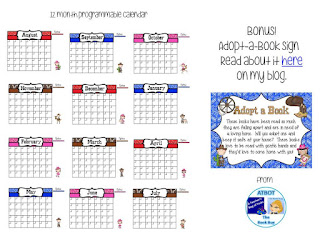
I have some new product themes in my store that you might want to check out.
We've been back to school for a couple of weeks now, and I got through most of the 2nd-5th grade class orientations last week. I have been wanting to try something a little different with my 4th and 5th grade classes for the last couple of years.
Last year I did a Library Ninja scavenger hunt which you can download for free HERE.
This year, I decided to take it a step further and go digital, making it a kind of break out scavenger hunt. I had been hearing a lot about Breakout EDU at conferences and I really wanted to try something similar to that for orientation. So I was brave and jumped in with both feet. Here are the deets...
First, using a Nearpod lesson that I shared with my students in Google Classroom, I went over policies, like how many books can be checked out and for how long, and briefly talked about making sure they take care of what they check out.
Then I share about some of the cool books they can find in our Media Center, including Escape from Mr. Lemoncello's Library by Chris Grabenstein. And I showed this student-made book trailer I found on YouTube:
This set the scene for the next part of our Orientation...the breakout scavenger hunt.
Within the Nearpod lesson I shared a Google Form which has the first clue of the breakout scavenger hunt. This breakout scavenger hunt covers all of the sections of our media center including checkout and the return desk.
To get to the next clue, they had to type in the correct code found in the section of the Media Center that the clue refers to.
I hid code numbers within each section which students could easily find if they carefully read each clue. Each code had an emoji on it, to go with our new theme for the year.
They had so much fun looking for the codes so that they could breakout before the time was up.
I gave them around 10 minutes to breakout.
They worked in groups of 2-3 at first and then I realized it was better if they worked in their table groups with just one of them carrying around their Chromebook...less of a chance of dropping the Chromebooks.
Now all of this sounds fun and exciting, but I am sure you are asking, "But how do you make the Google forms clues?"
Ahhh! Here is where the REAL fun begins. <insert evil laughter> J/K
This part is a little involved and I had to do some research to find a way to "password lock" a Google form, but it is totally doable. I mean, I did it. Right?
I will do my best to explain the steps I took to get to the final product, but I will say that this YouTube video was a huge help in figuring it all out.
First, I planned out how many questions I wanted to ask and wrote out those questions. Then I opened a Google form and started from question 12 and worked my way backward to question one, making a new Google form for each question. I worked backward so I would have the link needed for students to get to the next question on the next Google form. A colleague pointed out that you could go ahead and make all the questions and insert the links later, but I guess I just wanted to do it in one go.
The picture above is what the Google Form looks like when you are writing the question. After you write the question, you have to choose what kind of answer it will require. In this case, it will be a short answer.
Next, you can choose that the short answer be a number and that the number be a specific number by choosing "equal to." You type the number that it should be in the next box to the right. In this case, the answer is 80.
Next, be sure to mark that the question is required.
The three little circles next to the "Required" option gives an option for a "Response validation." If you want to let your students know to try again if they get it wrong, you can choose this option and put that response in the box next to your correct code answer.
Next, you will need the link to the next question. This is where working backward from the last question to the first comes in handy, but you can always create all of your questions and then come back to this step. To find the link, first be sure that you are in the next question's Google Form and click the Send button. Choose the link option and a link to that question will be given to you. I also chose to shorten the URL just to make it cleaner. To make it even shorter, you could use a URL shortner like bit.ly or tinyurl.
Now go back to the previous question's Google Form and click the Settings gear up at the top. In the box that pops up, choose the center option, Presentation. The box at the bottom is where you type in that the students typed in the correct code and need to click on the link to go to the next clue. This is what I wrote "Yes! That is correct. Click on this link to go to your next clue: (the link you copied from the next question will come here)."
Do this for all of your clues and for the last clue, link to a jpeg saved in your Google Drive to let students know they have broken out. The picture above is the jpeg my students see when they breakout.
So that is how you do a digital breakout scavenger hunt for orientation. If you'd like to go through my questions, you can click HERE for the first Google Form. Keep in mind that these questions are based on the sections in my Media Center and wouldn't work for everyone's Media Center. But you are welcome to create your own based on these questions.
The answers are
1) 80
2) 65
3) 31
4) 73
5) 35
6) 24
7) 98
8) 18
9) 53
10) 64
11) 47
12) 12
I hope you can understand my wacky directions if you try this out yourself. The YouTube video is probably much more helpful, but maybe my picture notes will help guide you, too.
Although I've blogged twice in a short period of time, I don't tend to blog as much as I used to. However, I do post a lot on Instagram and on my Facebook page, if you'd like to follow me there.